Have Ewe Any Wool?

Sunday, July 31, 2011

Tea Cup Pin Cushion


This month, in the "Play Shop" group, we made pin cushions for our swap partners. I struggled for a while on what type to make and how to make one. Then I ran across the instructions for making a "Tea Cup Pin Cushion" in one of my craft magazines and thought that would be perfect! I "googled" instructions for other versions of "tea cup pin cushions" on the internet and combined what I thought was the best of each into the final method that I used to create the pin cushion.

I had all the needed bit - thread, fabric, embellishments, very fine steel wool, fiberfill, fabric glue and of course, my handy glue gun. The only thing I was missing was a tea cup. So, I headed out to our local resale shop and found a very cute tea cup with a matching saucer that had both blue and white - my swap partner's favorite colors. Perfect!


I took a fat quarter of fabric (in blue, of course!) and used one of my mixing bowls as the guide for drawing a circle. (The medium Pyrex bowl in my nesting set of 3 mixing bowls was the perfect size!) I cut out the circle of fabric and made a running stitch around the edges so I could easily gather it. This would become the main part of the pin cushion.

One set of instructions advised putting a bit of very fine steel wool in what will be the top of the pin cushion in order to keep the pins sharp. This was to counteract the effect of the fiberfill as it tends to dull the pins. So, I tore off about an inch of the steel wool and formed it into a round disc about 5 inches in diameter and placed it in the center of the cloth circle. I then added a bunch of fiber fill and cinched it shut.

When I "tried the teacup on for size" by tentatively placing the pin cushion in the cup, I found that the "stuffed pin cushion" didn't quite reach the bottom of the cup. Worse yet, if I pushed it down, it would spring back up. This didn't seem very stable to me, so I decided to put a pad of wool at the bottom to hold the pin cushion up a bit higher as well asprovide a more solid base. Roving isn't just for spinning anymore!!! Satisfied with my more stable "design", I slathered the inside of the cup with glue and stuck the fabric pin cushion inside.

Finally, I cut some strung "pearls" and glued them to the top edge of the pin cushion for an added decorative touch. (I used glue for attaching gems and rhinestones to fabric so it would hold well.) I was quite please with the finished pin cushion. Even DH thought it was cute! I believe I'll make this project again - perhaps one for myself???


NOTE: I did not glue the saucer to the plate - I thought it would be more useful to keep the two separate - that way, the saucer could be used as a button or bead tray and the cup would strictly be the pin cushion....with or without the saucer beneath it.


Wednesday, July 27, 2011

Franken-Wheel

Alice found a really cool spinning wheel...affectionately known as the "Franken-Wheel". It's made of the parts from several different wheels, plywood, random wood bits, and a stool. It spins amazingly well. I loved checking out all the "parts" it was comprised of - I found it fascinating!

It looks like the orifice is from an antique wheel and the "base" from a small wooden stool. In spite of the variety of components, I think the over-all look of the wheel is nice...perhaps even a bit elegant.

This time of year is perfect! "Nature's Bounty" is definitely evident as I stroll through the neighborhood. The wild raspberries and the Queen Ann's Lace are definitely in abundance.

The past two days, I've been able to pick enough wild raspberries for DH and I to each have a refreshing bowl of fresh berries. It was the perfect summer "after dinner treat.


I also noticed that there was an abundance of Queen Ann's Lace...all ready for the picking and the dyeing. It produces a very nice "baby yellow". I didn't pick any - I've done this in the past, but since I'm not a fan of yellow, I didn't feel compelled to try it again. There are a number of great tutorials that detail the process of harvesting the Queen Ann's lace, making your dyeing "liquor", and the preparation and dyeing of wool. My personal favorite is Toni's instructions at The Fold.


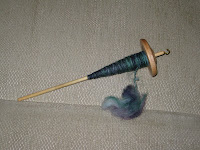
I haven't tried plying the 2 ounces of Shetland that I'd spun on my drop spindle last month. I guess I'm afraid to try - it will be my first attempt ever to ply on my drop spindle. Instead of plying, I started spinning a new color of Shetland. This roving is a greenish-blue. I love this - it reminds me of the ocean. The Shetland is very easy to spin...and I find it very relaxing. When I drag my drop spindle with me, I somehow manage to find a number of unexpected opportunities to work in some spinning.

Sunday, July 24, 2011

Adventures in Dyeing


I finally tried my hand at Crock pot dyeing. As part of a swap, a group of us were to create some hand dyed yarn in the yarn weight of choice for our partners. This was just the stimulus I needed! The past two years, I wimped out and dyed using Kool-Aid. I've mastered that....so next on my agenda was crock pot dyeing.

My partner plans to use her yarn for socks, so I chose some sock weight Merino (left) and turned the crock pot on after adding just enough water to cover the yarn (right).


I pre-soaked my yarn in Vinegar water in the crock pot.


While the yarn was pre-soaking, I measured out the bright blue dye and the magenta dye into two separate canning jars. My goal was to create yarn that was about 35% magenta, 35% blue, and 35% purple.


While the crock pot was heating up, I prepared the dye by adding water and vinegar to my pre- measured bright blue and magenta dyes (left). After stirring to make sure they were properly mixed, I put some of each color in my squeeze bottles (right)...for ease of application.


Once the wool had soaked for about 15 minutes, I then added the dye - magenta on one side and blue on the other. I "encouraged" the two colors to mix in the middle. The yarn took the dye rapidly and left quite a bit of white. I expected that and was prepared to turn the yarn over in the crock pot and add more dye. That fixed most of the "white" issues, but I definitely did not get the planned results!


I had much more color separation than I had planned and very little purple. I had expected there to be various shades of purple in the center where the two colors "co-mingled". It didn't quite come out as planned. Instead, I had quite a bit of magenta and quite a bit of blue with only about 5% purple!

I guess I need to work on my dyeing skills a bit. I have plenty of yarn and plenty of roving to work with, so I'll definitely enjoy the process...and hopefully learn a bit more each time I try my hand at dyeing!

Thursday, July 21, 2011

Tour de Fleece Update


The first bobbin of my hand dyed Targhee is finally done! Ready to start on the second one! Tour de Fleece has truly helped keep me on track with my spinning projects! There are only a couple of more days, to go. I've managed to spin some on every day...even the "rest" days!


Of course, with all the spinning, my knitting and other things get pushed to the back burner...and exhibit little or no progress. If only there were more hours in a day!

Now to segue from spinning to weaving....and a bit of Norwegian culture. My friend, Melanie, recently traveled to Norway and took sojme weaving classes in Bergen. She had a wonderful time and made some incredible samples. What a fabulous experience!


She purchased some completed weaving as well. What I found interesting was that both sides of the weaving are typically used. The more ornate side is the side used when you have company. The other side is for every day use. Pretty cool, eh?


Melanie also brought back fabric and ribbons to make an alternative Bunad. It has purples and greens in it and is absolutely gorgeous. The model for her new Bunad can be seen in the post card on the left. The Bunads are definitely a piece of art and cost a pretty penny to make, but are definitely worth it! I really need to start looking at/planning mine!


Beadwork compatible with her current belt.


Below is a close-up of the beadwork for the new Bunad and the skirt fabric to go with it.


A compilation of the components - scarf, skirt fabric, silk, yarn, and beading - for the new Bunad. I just LOVE the colors!!!!


Sunday, July 17, 2011

Small Projects

This week, I decided to try a couple of smaller projects. I'm going for nearly instant gratification. I guess I'm trying to keep up with my knitting so all of my efforts aren't dedicated to the Tour de Fleece!


First up is a "Wine Placemat". I made this from cut up plastic grocery bags. I cut the "yarn" into loops looping them together to form a continuous strand of yarn. It's a washable placemat...perfect for a wine glass and a bottle of wine.


Next is the Tardis dish cloth using the Doctor Who TARDIS Dishcloth by holynarf. It was a quick and easy knit and a definite must for a Dr. Who fan!


Friday, July 15, 2011

Tour de Fleece Progress

.

Wahoo! I finished the first bobbin of the red combed Targhee from Sweetgrass Fiber last Wednesday. Last night, I finished the second bobbin. (It doesn't look like much, but the Louet bobbins are HUGE - there's 2 ounces of spun singles on each of the bobbins.


Tonight, I finished plying. the singles came out nearly perfectly even. I used about 1 1/2 feet of the singles to tie my skein together, and the small string shown in the photo on the right is all I have left of the singles. Talk about "waste not, want not", eh? Generally, I have a substantial amount of singles left over, but this time, I weighed the fiber in order to split it in half...and that seemed to do the trick!


The plied yarn appears to be well balanced, however, part of that may be because the yarn has "lost some energy" as it sat on the bobbin waiting to be plied. None the less, all I need to do now is soak the yarn and then hang it to dry to set the twist. Then I'll be ready to start the "Holden Shawl" - my dissertation for the latest round of "Nerd Wars". "Tour de Fleece" is really helped keep me on target - spinning every day ensured that I would make great progress on the hand spun that I committed to creating and using for the "Holden Shawl".

I've also got both ounces of the Shetland that I hand spindled wound into center pull balls. Next step in this process is to ply them together using the drop spindle. I've never plied with the drop spindle before, so this could be a bit of a challenge! My first obstacle will be determining what I'll use for a lazy kate...and how I'll tension the singles for plying.


Last night, I was totally inspired at the Goose Creek Ruggers guild meeting to try my hand at hooking a "stained glass" style rug. I love how it's all outlined in black...just like stained glass. It's stunning! (Sorry about the quality of the photo...I'd forgotten my camera, so all I had was my cell phone.)


I'll end with a few nature shots. The weather has been absolutely beautiful the past few days, so I took full advantage of it...wandering through the neighborhood with my four-legged buddy...and discovering all sorts of butterflies enjoying the local thistles. (Be sure to double click on the photos for a closer look.)